Instructions for adding and configuring a merchant
When you create a company in Matic you must also create at least one Merchant with one or more payment gateways, this way you will be able to collect your money and receive it in the gateways you have configured.
Matic supports multiple merchants and in turn each merchant can associate the necessary gateways to process their payments.
To create and manage your merchants, you must locate the Merchants module located in the main menu, do not worry if you see a warning icon, this icon indicates that there is no merchant yet or that a merchant is not fully configured to process transactions. If there is no merchant created it will look like this:
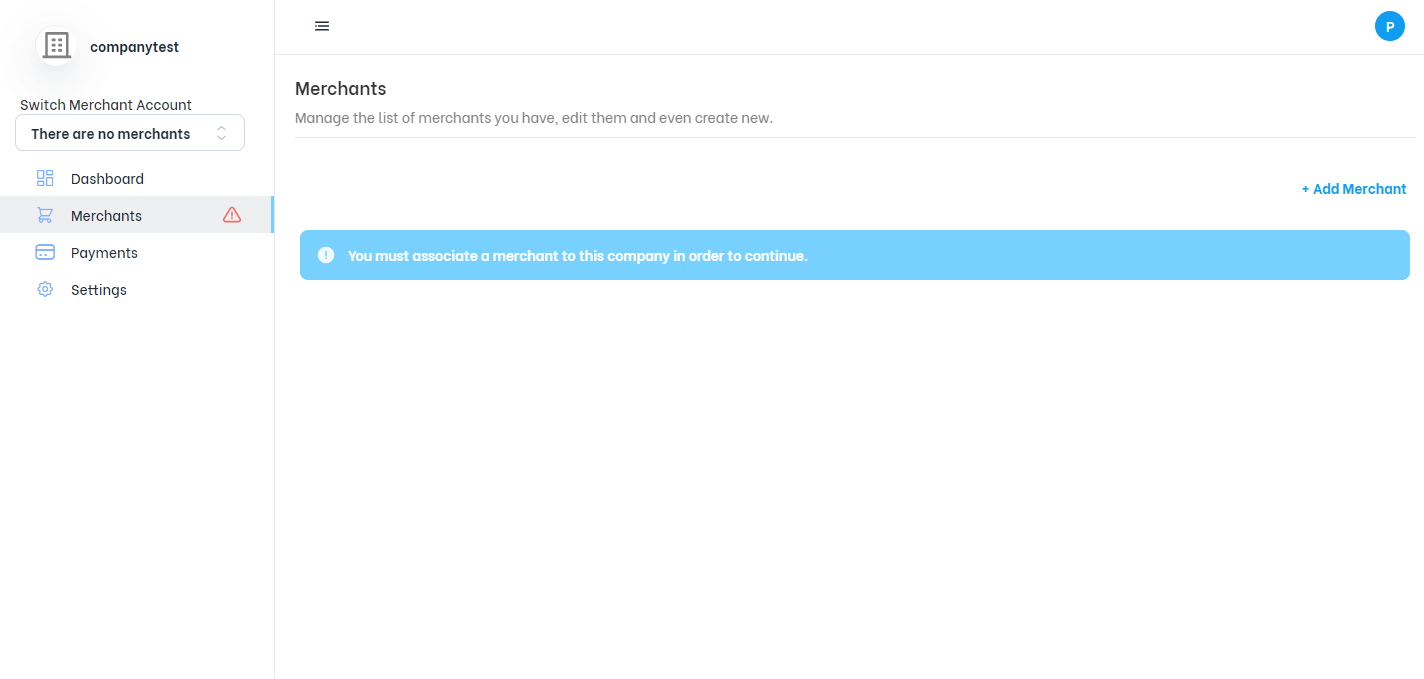
Company with no merchant added
To register the merchant you must click on the Add Merchant button at the top right of the screen; this will open a new form where you will be asked to complete the information in each of the steps with basic information, logo, your first gateway information and gateway configuration.
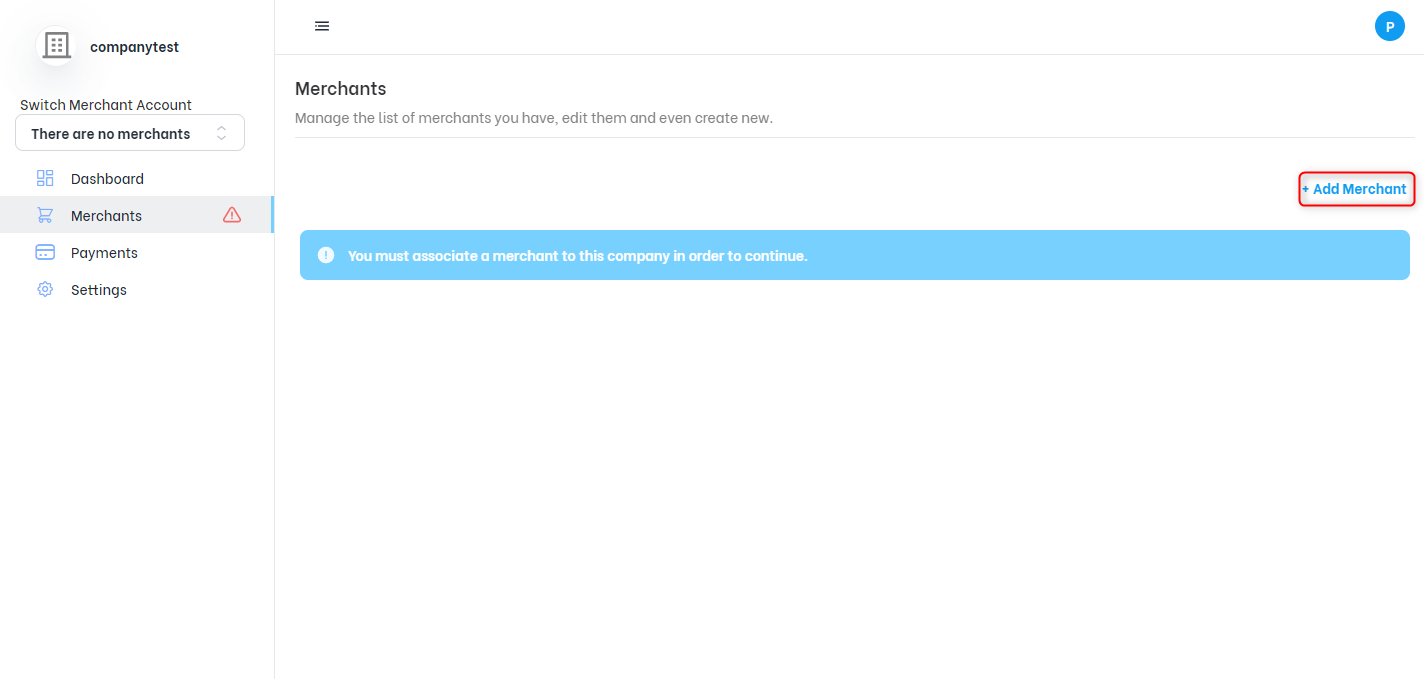
Add a Merchant
A window will be displayed showing you the steps to follow to configure the merchant you want to add:
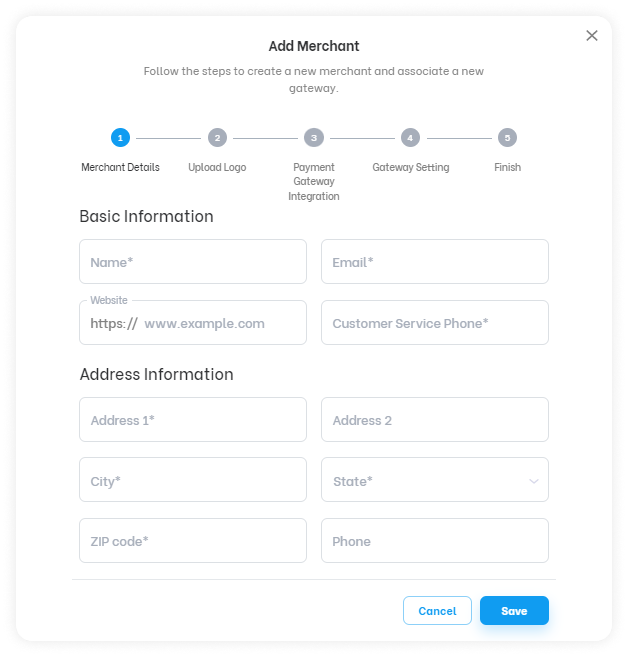
Merchant Details: Basic Information and Address information.
In step 1 called merchant details, you must enter the basic merchant information and address information.
The fields to be completed for the basic information section are:
- Name: The name by which the merchant will be identified within Matic.
- Email: The merchant's email, through this email the merchant will be able to receive notifications and important information for the operations to be done in Matic.
- Website: The URL address of the merchant's website, this parameter is optional.
- Customer Service Phone: The merchant's customer service phone number.
For the Address information section the fields to complete are:
- Address 1: Main address data, such as street, number, avenue, among others.
- Address 2: Complementary data of the main address, this is optional.
- City: A city belonging to the state where the merchant is located.
- State: A state belonging to the country indicated.
- Zipcode: A five-digit zip code.
- Phone: A telephone number associated with the merchant, this parameter is optional.
Make sure that at least the mandatory fields marked with an * are completed, then press the save button and a notification that the merchant has been created will be displayed, as shown in the image below.
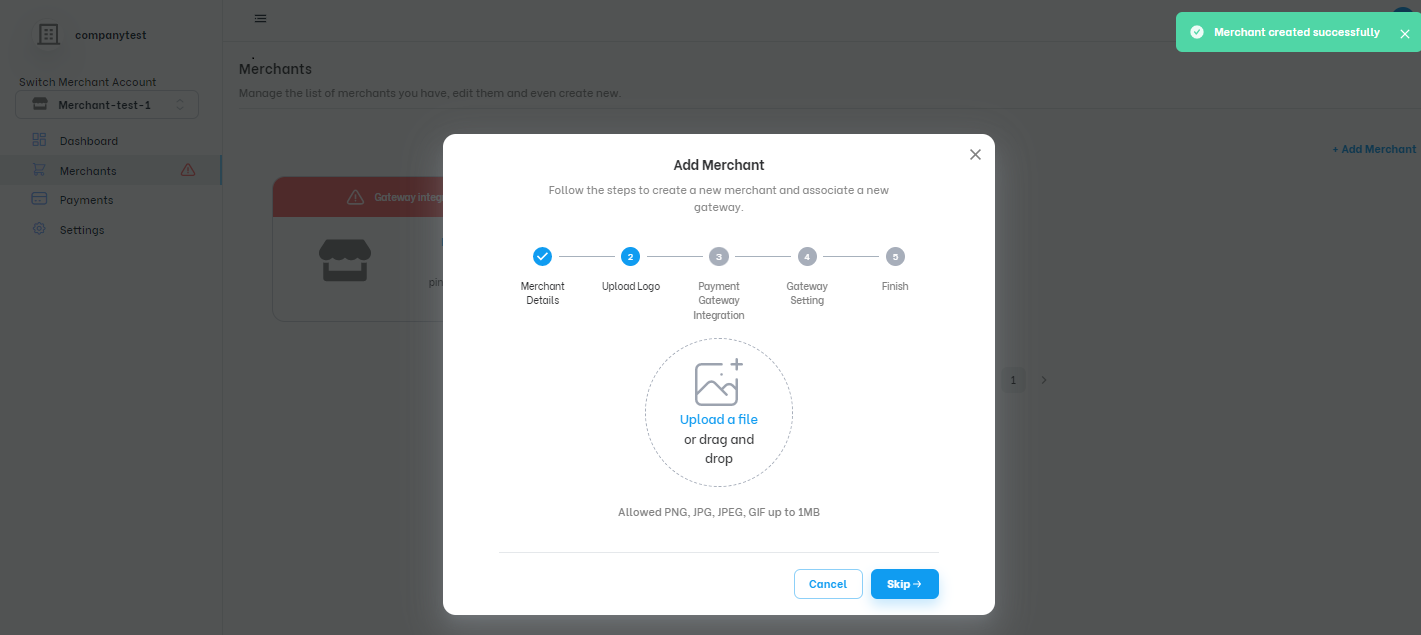
Merchant created
In step 2 you can add a logo to visually identify the merchant or you can skip this step to do it whenever you want, if you want to complete this step you must upload an image in one of the allowed formats (PNG, JPG, JPEG, GIF) with a maximum size of 1MB and press the save button, a notification that it was successfully added will be displayed, then you can continue to the next step.
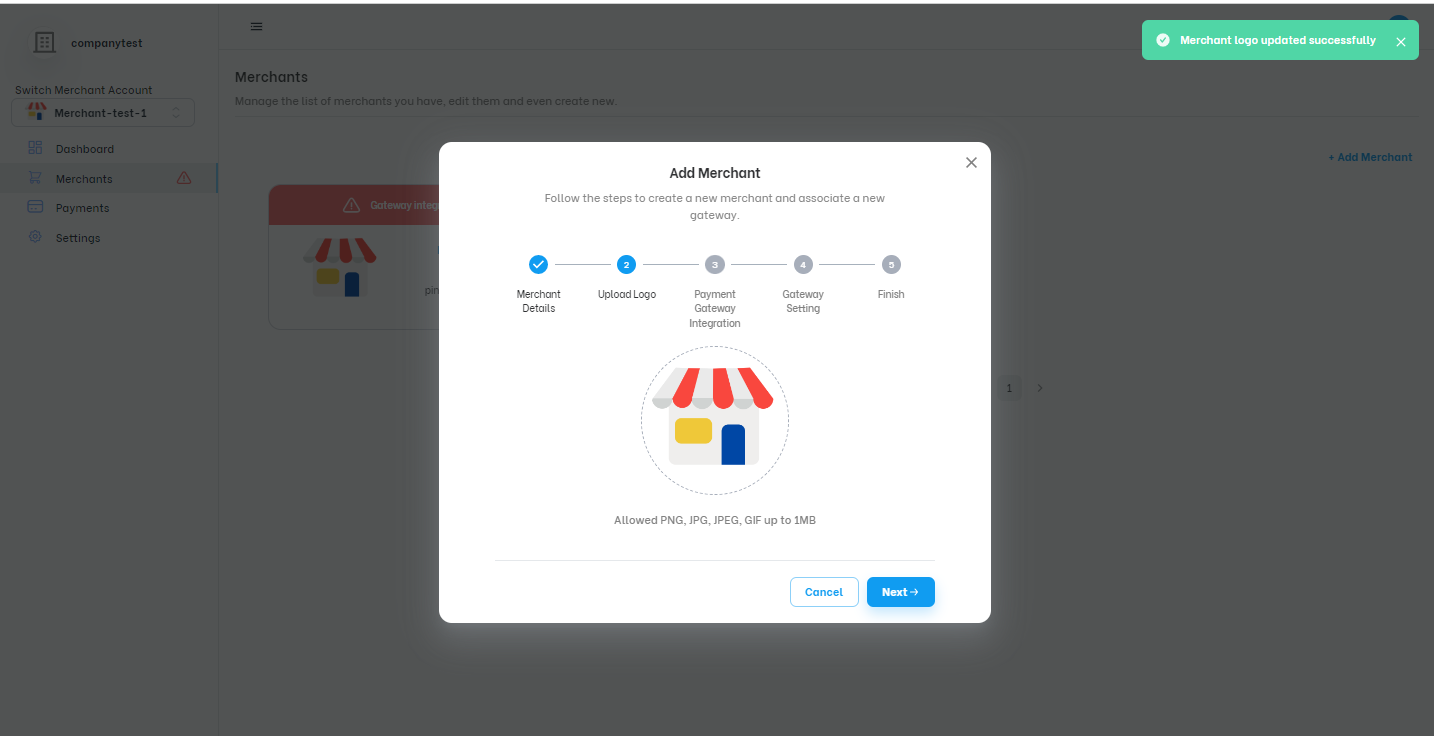
Upload logo
Step 3 is the gateway integration, this step shows the list of gateways available to add, you can choose between Authorize.net, USAePay, NMI or Channel Payments (you can choose to skip this step but if you do not have integrated gateways you will not be able to process transactions).
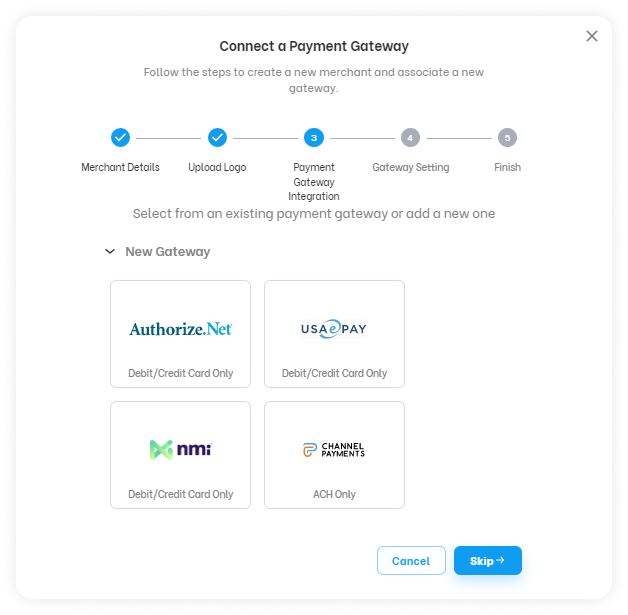
Payment Gateway Integration
Depending on the chosen gateway you will have to enter the fields requested by each of them, you can see in more detail how to do this in the tutorial on How to add and configure a gateway?
You can see how this step is performed using an Authorize.net gateway integration example described below.
To integrate an Authorize.net gateway you must enter the requested fields: Gateway Name, API Login ID and Transaction Key, the latter two values are obtained as indicated in the tutorial How to connect an AuthorizeNet gateway?, in the test environment you need to check the sandbox credentials checkbox.
Remember that you have these tutorials to learn how to obtain the credentials of our available gateways and use them for integration:
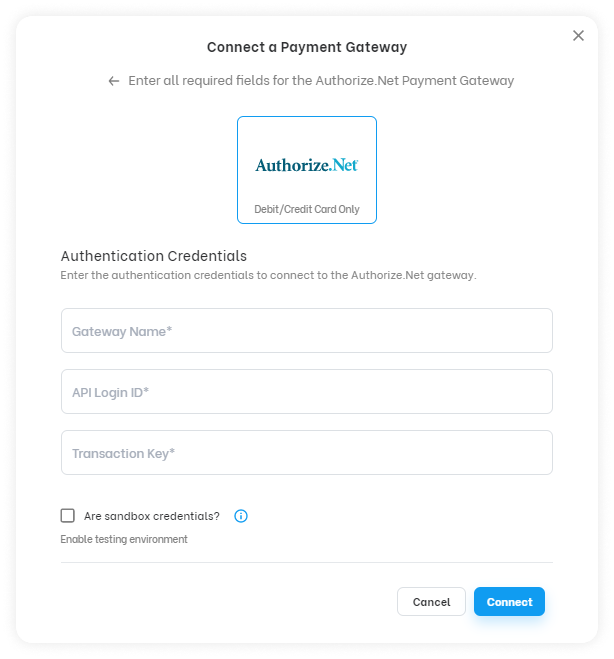
https://matic.readme.io/reference/how-to-connect-an-channel-payment-gatewayGateway Authentication Credentials
Once the fields are completed you must click on the connect button, a notification that the gateway has been connected will be displayed and you will move to step 4.
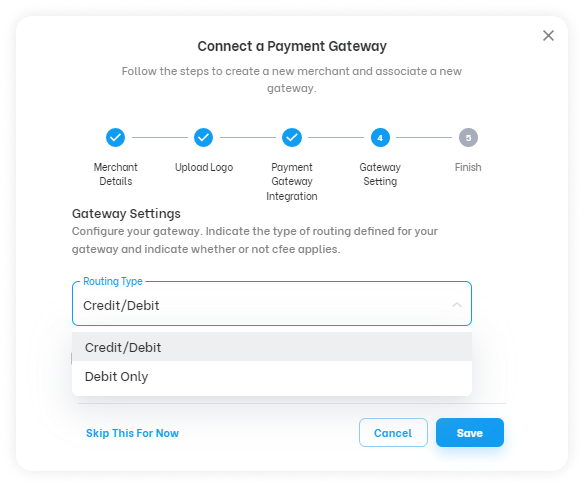
Gateway Setting-Routing type
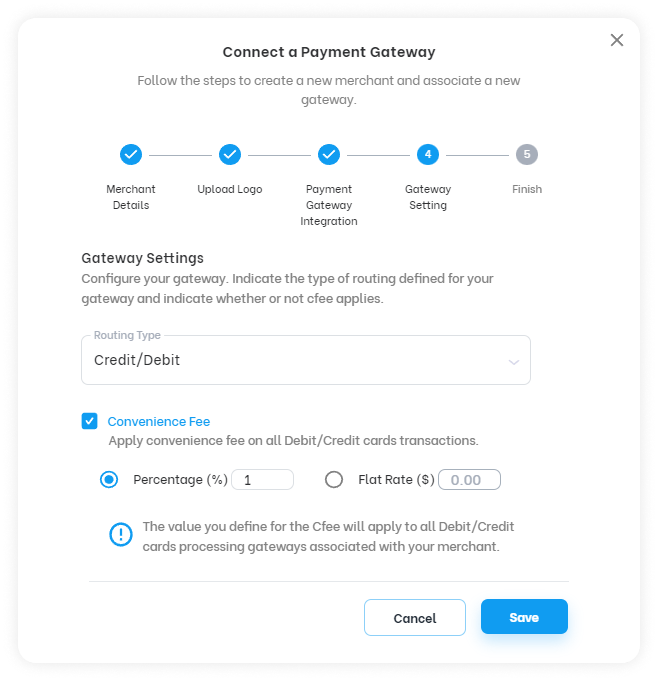
Gateway Setting-Convenience Fee
In step 4 you must now configure the gateway, this configuration specifies the type of routing the gateway will use and whether or not to apply a convenience fee (Cfee) to the transactions processed by the gateway.
The routing types available are credit/debit, debit only and ACH. Credit/debit routing will be used to process credit or debit card transactions, debit-only routing will be used to process debit card transactions only and ACH will be used to process bank account transactions.
The convenience fee will apply a fee to all transactions processed by the gateway and can be configured as a percentage of the amount to be processed or a fixed amount.
Once the requested data is completed you must press the save button and the respective notifications about the gateway configuration will be displayed, at this point if you completed all the steps successfully your merchant will be fully configured and ready to process transactions.
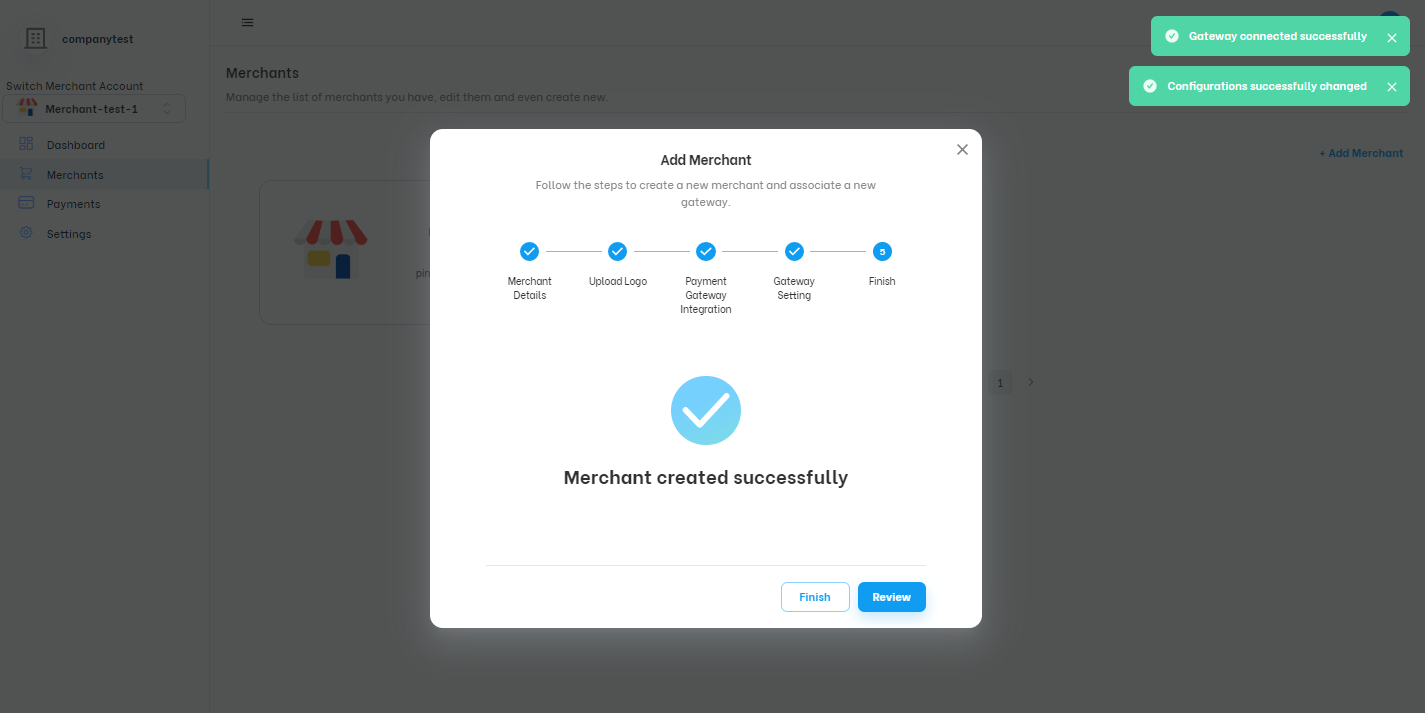
Merchant created and fully configured.
