Instructions for adding a gateway and configuring it in the merchant
To add a gateway you must click on the Merchants option in the main menu, when doing this the list of merchants will be shown in which you must select the merchant of your preference and click on it. Next the merchant details will be shown divided in three tabs or sections, you must select the Gateway Integration tab and click on the Add Gateway button.
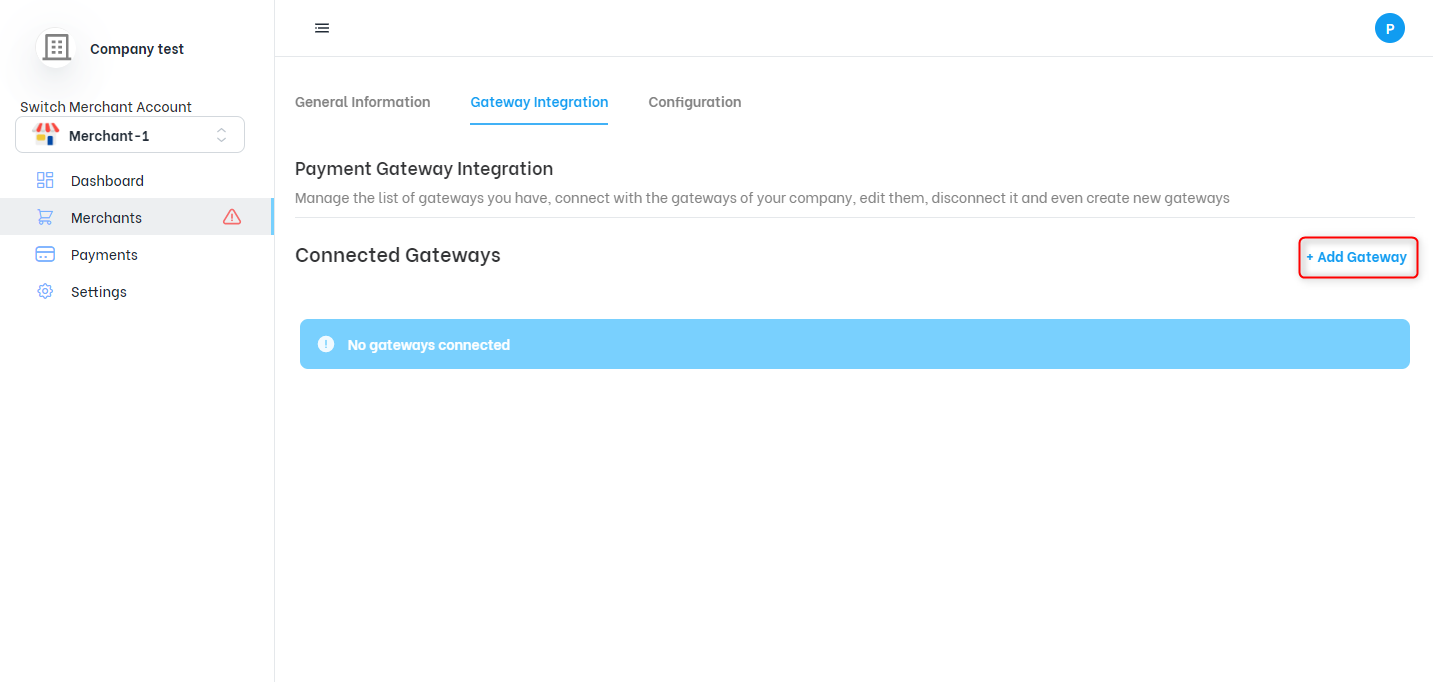
Gateway Integration.
Once the Add Gateway button is clicked a new window will open requesting the information. There are two ways to add and configure a gateway, the first option is to add a selected gateway from the list of new gateways and the second option is to add a gateway from the list of gateways previously connected by a merchant.
NOTE:
When you sign up for a sandbox account you also get two default gateways USAePay and Channel Payments so you can connect them into your new merchant. The extra gateway creation is not allowed in this type of account.
First option: Add a New Gateway
To add a new gateway you must select the New Gateway option, then the available gateways will be displayed and you will be able to select the gateway of your choice by clicking on it and then press the confirmation button.
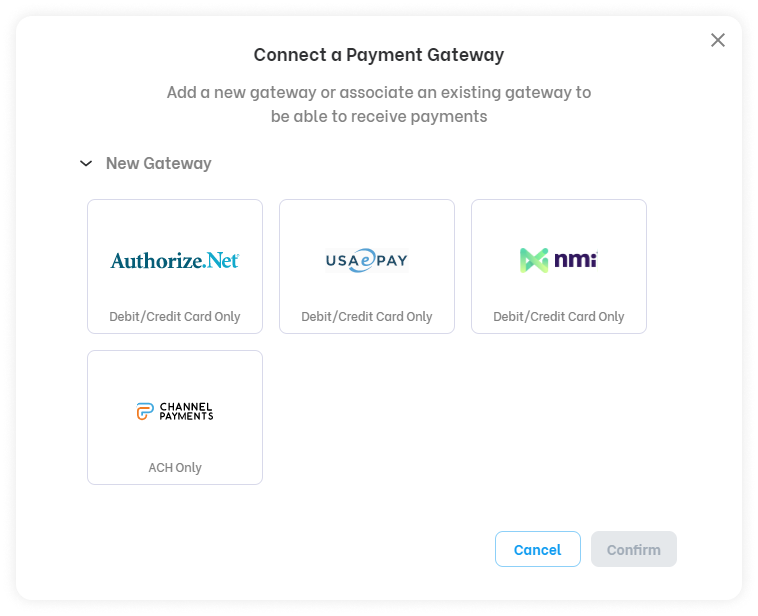
New gateway from gateway integration section.
- The form will be displayed with the fields required by the gateway you have selected, these fields are dynamic, so each gateway requests different data and may change over time; in the following images you can see the fields currently requested by each gateway:
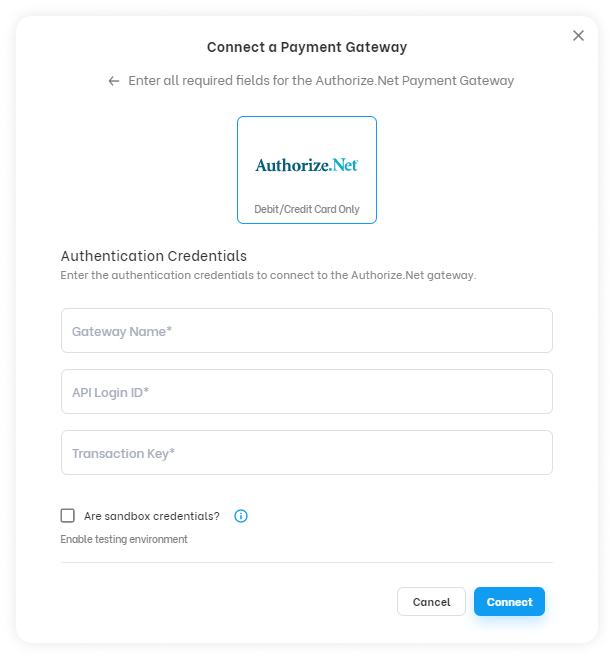
Authorize.net gateway.
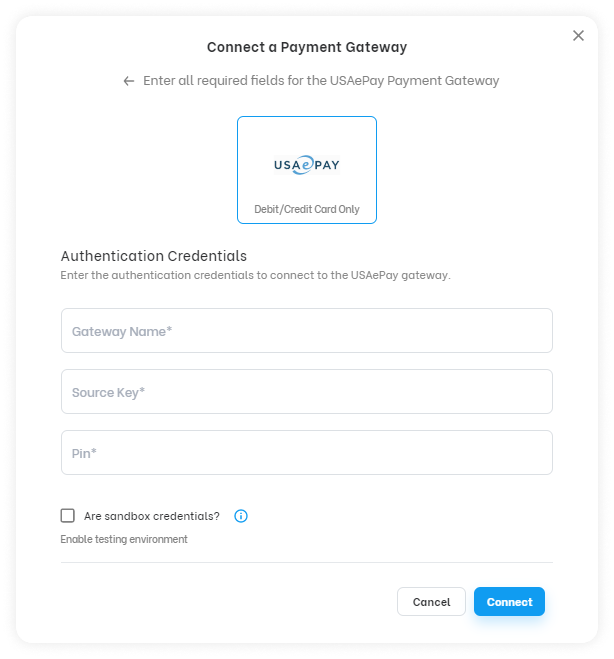
USAePay gateway.
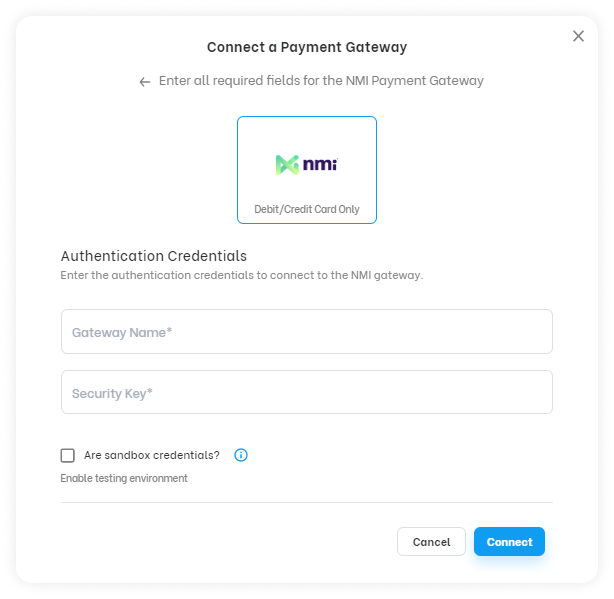
NMI gateway.
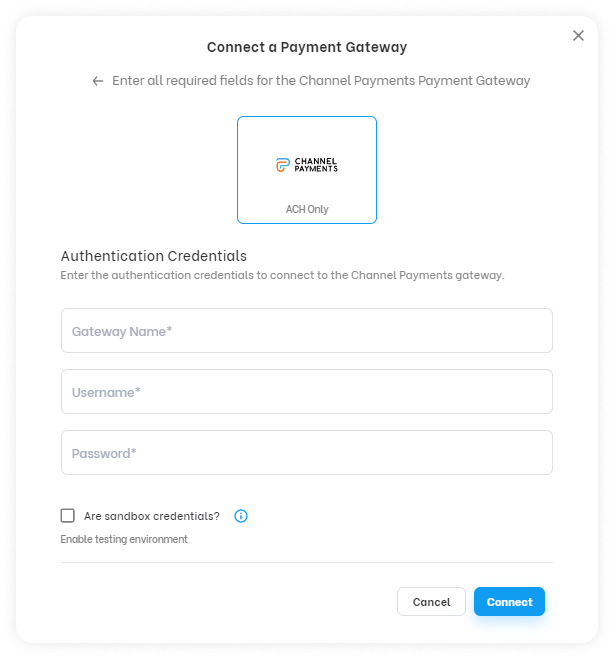
Channel Payments.
You must complete the required fields and establish if you will use the gateway in a test environment or in a live environment, to use the gateway in a test environment you must check the checkbox specifying that they are sandbox credentials in case you do not check the checkbox the gateway will be configured in live environment.
Remember that you have these Guides to learn how to obtain the credentials of our available gateways and use them for integration:
- Once you have completed the requested data click on the connect button and a notification that the gateway has successfully connected will be displayed, immediately the form will appear to configure the gateway's own data, the type of routing it will use and whether or not it will charge a convenience fee (Cfee) to the transactions.
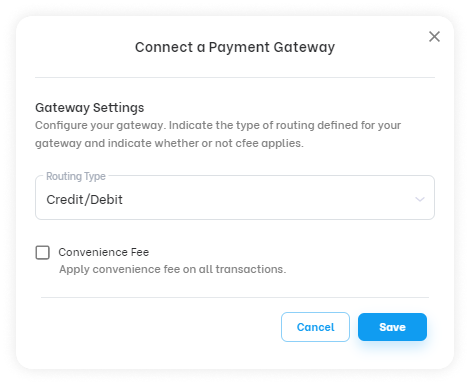
Gateway Settings.
The routing can be credit/debit or debit only for Authorize.net, Usaepay and NMI gateways. For the Channel Payments gateway the only routing type available is ACH.
If you require the gateway to charge a convenience fee on transactions, you must check the box and provide the requested values, the convenience fee can be set as a percentage of the transaction amount or a fixed dollar amount in addition to the transaction amount.
It is important to mention that the value defined for the Cfee in this section will affect all gateways associated to your merchant.
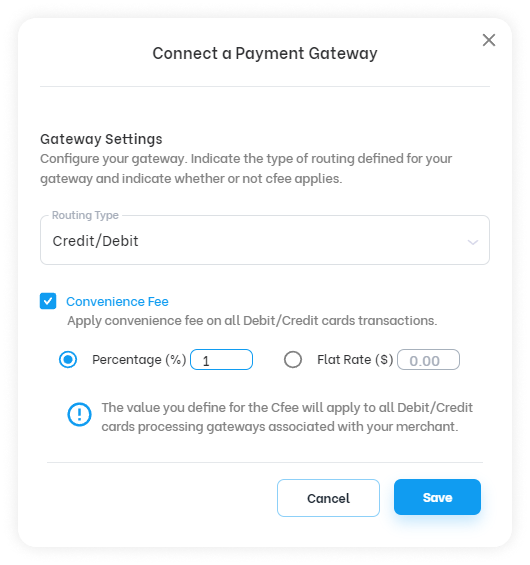
Gateway Settings - Convenience Fee.
- Pressing the save button will show a notification that the gateway has successfully connected and will be displayed in the gateway list in the gateway integration section of the merchant.

Connected gateway.
The second way: Add a Existing Gateways
This option allows you to connect a gateway that has already been previously configured in your company by selecting the gateway from the list of existing gateways and pressing the confirmation button.
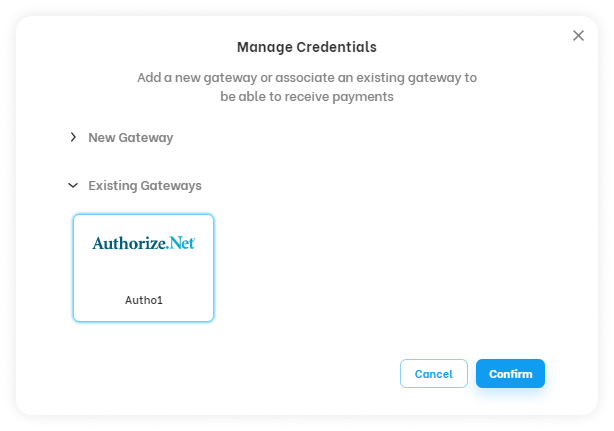
Add a existing gateway.
After selecting it you will be able to change the configuration and adapt it to the configuration you want for this new merchant, from this point follow the instructions of step number 3 mentioned above, after these steps the gateway will be available to process transactions.
Note
It is important to remember that gateways of the same type must differ in their configuration to be connected, for example, if I have a gateway of type authorize.net with routing type debit only and without cfee I must not have another of the same type with the same configuration.
